Building the interface of a music app is quite challenging. However, with the use of React Native framework, it may not be. If not built-in components, you can take components from a third-party library and make the app development process much faster and easier. In this article, let’s learn how to create a music app with React Native, guided by the experts of React Native development company.
First, we have to perform some pre-requisite tasks.
Setup the environment
If this is the first project that you want to build using React Native, then you need to get the environment set up in your dev system. However, if you already have set up the environment, then skip this step and move forward toward creating the template for the project.
In case, you want to know how you can set up the environment, check the linked article.
Note that, here we have chosen React Native CLI. So, you have to install Android Studio, React Native CLI, Node, JDK, and VS Code editor. This varies on the OS and React Native tool you choose for your project.
Create a project template
To add the codebase, you need a place or a container. This is why we need a template. To create one, you have to choose a folder in your dev system and then run cmd or open a terminal from this folder. Here, you have to pass the command (npx react-native init Music-app –version 0.71.3). It will create a simple template ‘Music-app’ in your chosen folder. Also, we have considered React Native of version 0.71.3. Now, you can add the required third-party library and also add files to your project.
Precisely, this is the foundation of your project.
Getting third-party plugin
Third-party library support is the most unique feature supported by the React Native framework. In the current project, we have to install three plugins namely React-native-simple-audio-player, @react-navigation/native, and @react-navigation/native-stack. The first one is for the Audio Player component and the other two libraries are for the stack navigator ensuring that the user can easily navigate between the screens with the list of songs and the screen for playing particular audio.
There are the given commands using which you can install the stated libraries.
- npm i react-native-simple-audio-player
- npm i @react-navigation/native
- npm i @react-navigation/native-stack
We will learn its usage in detail later in the article.
Adding assets and creating a codebase for the project
In this section, we will learn the entire construction process of the project in detail.
Assets folder
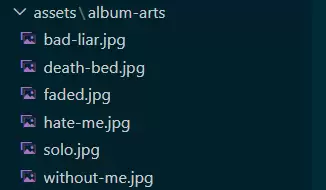
This is the folder where you have to add the image or the thumbnail of the album. You can simply create a folder named ‘assets’. You can also give it a different name as per your preference.
Refer to image 1 for the ‘assets’ folder of my project. Note that you must store the thumbnail image in png format.
Adding the ‘Components’ folder
Here, you have to store three files namely Data.js, AudioPlayer.js, and SongScreen.js. Let’s see its functionalities and the steps to create these files.
Data.js
This is the folder where you have to store the data for the album you want to present in your music app. The data includes duration, id, url, artwork, artist, and title. Below given is the code snippet for the Data.js folder
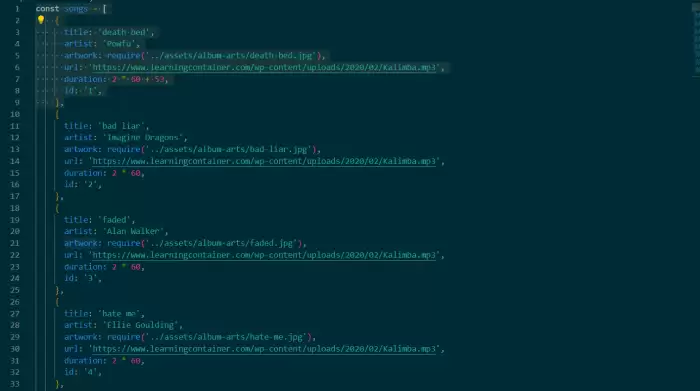
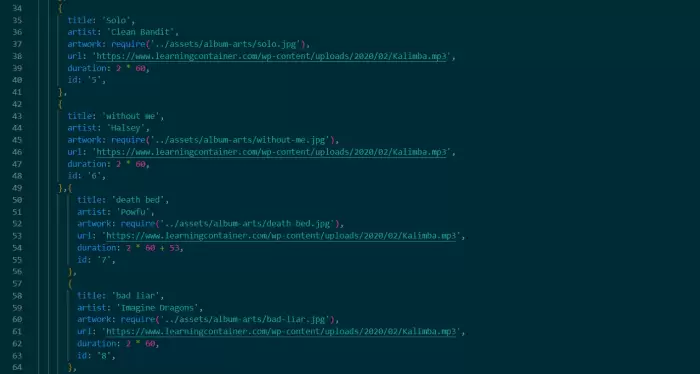
This way, you can add as many albums as you like.
AudioPlayer.js
Create a folder named ‘AudioPlayer.js in the ‘Components’ folder. Here is the snippet for the AudioPlayer.js file.
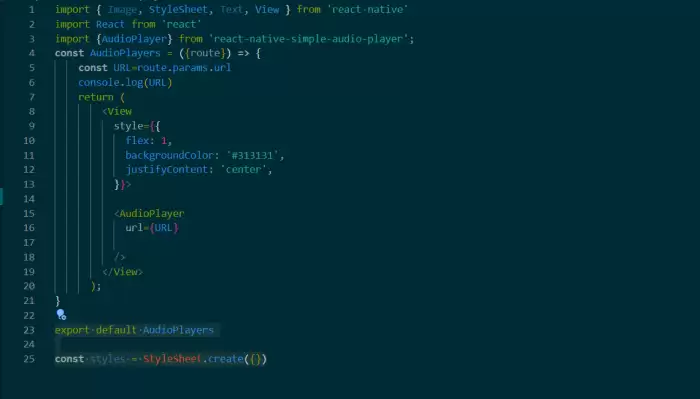
What the code does is import all the components from the relevant libraries. It also takes the AudioPlayers component from ‘react-native-simple-audio-player’.
The main component of this folder is AudioPlayer. It takes in a prop called ‘route’. It further contains a parameter called ‘url’. The value of ‘url’ is then assigned to a constant called URL.
The component returns a View component with a background color of #313131 and justifyContent set to ‘center’.
There are no styles defined in the StyleSheet.create method, so the styles constant is empty.
SongScreen.js
Make a folder and name it as ‘SongScreen.js’ folder. The name of the folder can vary as per your preference. Let’s check how can you build the folder.
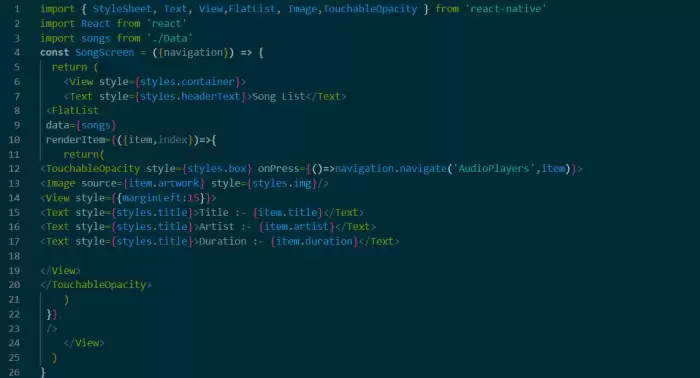
Import the components. Here, these are StyleSheet, Text, FlatList, View, Image, and TouchableOpacity. In this folder, we need the ‘songs’ component from the Data.js file.
The ‘SongScreen’ renders a View container that includes a Text header and a FlatList component. The FlatList component receives an array of songs as its data prop, and each song is rendered as a TouchableOpacity that includes an Image and three Text components displaying the song’s title, artist, and duration.
When a song is pressed, the onPress event handler calls the navigation.navigate method to navigate to the AudioPlayers screen. It passes the current item object as a parameter.
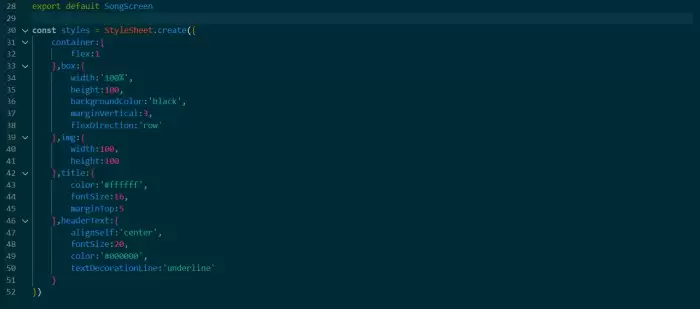
The StyleSheet.create method returns an object that holds all the style rules mentioned in the styles object. The styles object is exported along with the SongScreen component using the export default statement at the end of the file.
Here, the styles object includes ‘box’, ‘img’, ‘title’, ‘container’, and ‘headerText’.
Creating the App.js file
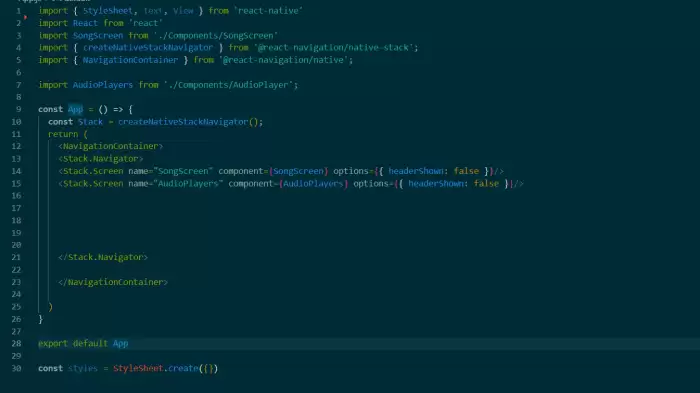
This is the main file ‘App.js’. This file is used to set up the navigation stack using the ‘NavigationContainer’ and ‘createNativeStackNavigator’ from the @react-navigation/native and @react-navigation/native-stack respectively.
The code imports the SongScreen and AudioPlayers components from their respective files: ./Components/SongScreen and ./Components/AudioPlayer.
You can refer to the code snippet shown in image 7 and frame the codebase.
To run the program
Open the VS code editor. Note that you should open the code editor for your built project. Create a terminal and run npm install and then run npx react-native run-android.
Consider image 8 for the project output.
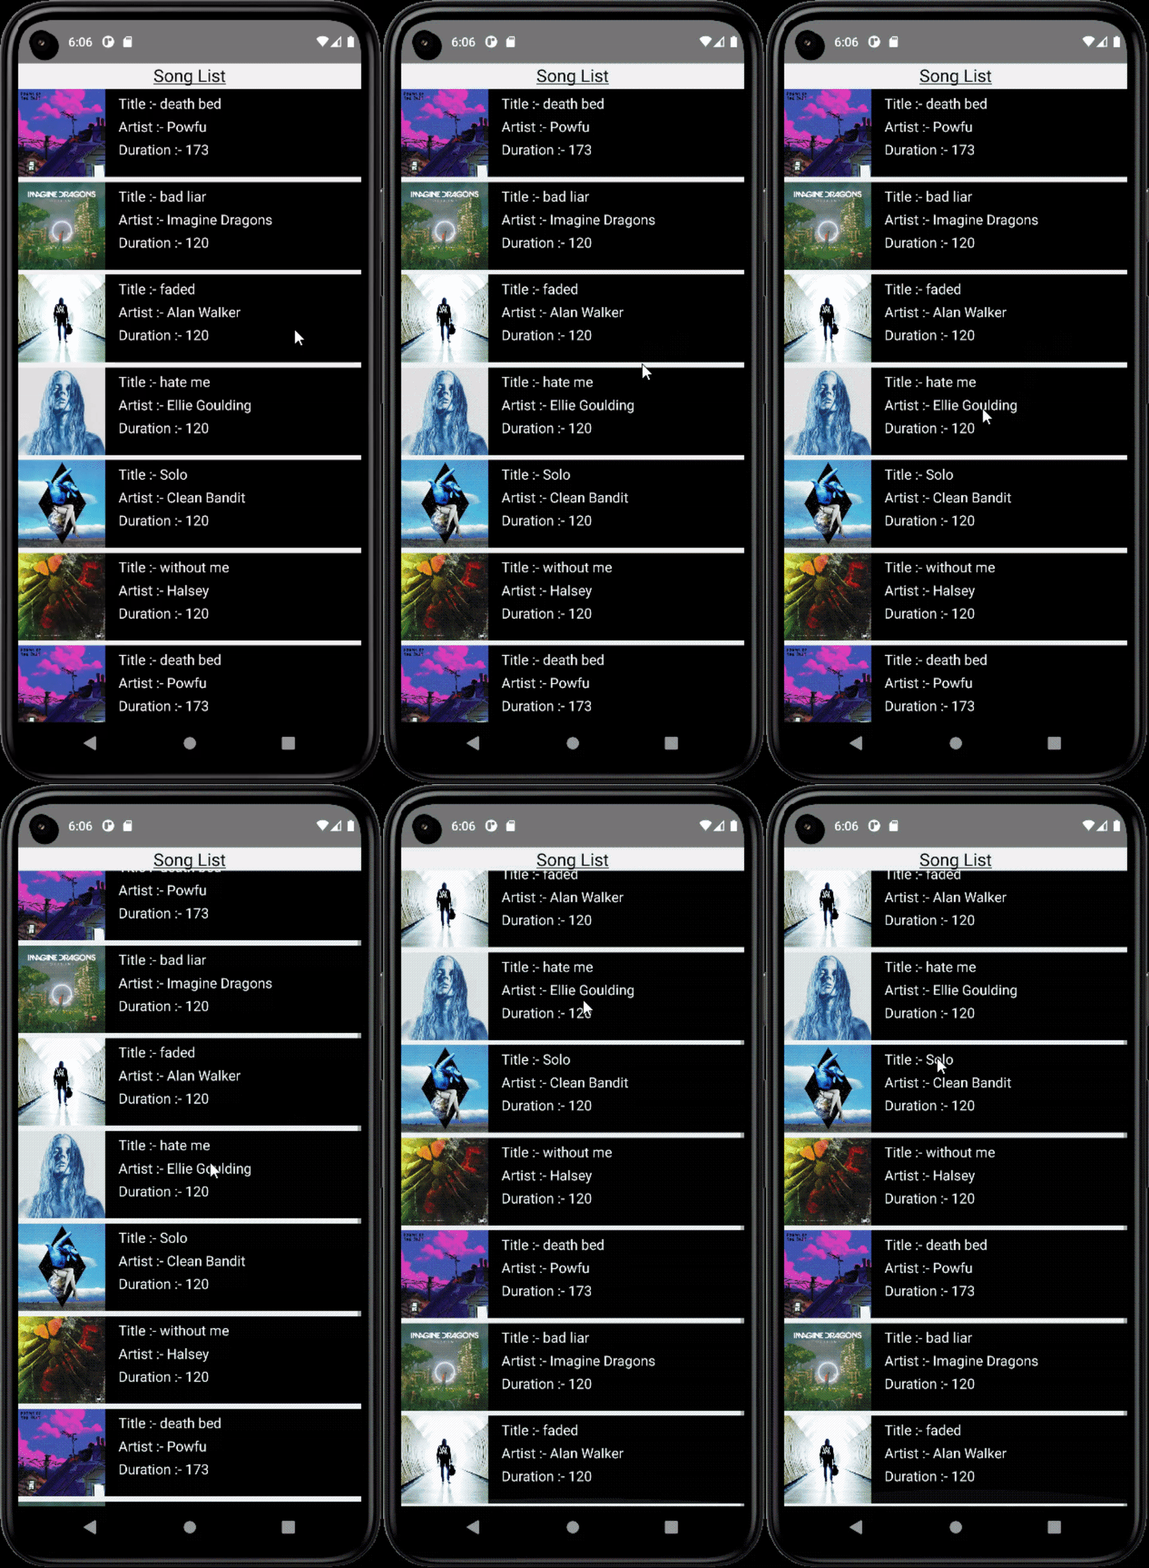
Practice creating a music app today and explore what additional functionalities you can add to it.


